Shells, catkins, bobbles, leaves… this textured stitch pattern has lots of associations! No matter what we call them, one thing is sure – they are just brilliant! It’s amazing how such little fellows can change your knitwear projects and make them unique and eye-catching. However, they are also tricky. Eh, there is nothing for free… But hello! This is the reason why I am here, right? Let me show you how to make this extraordinary stitch pattern and reach a satisfying result!
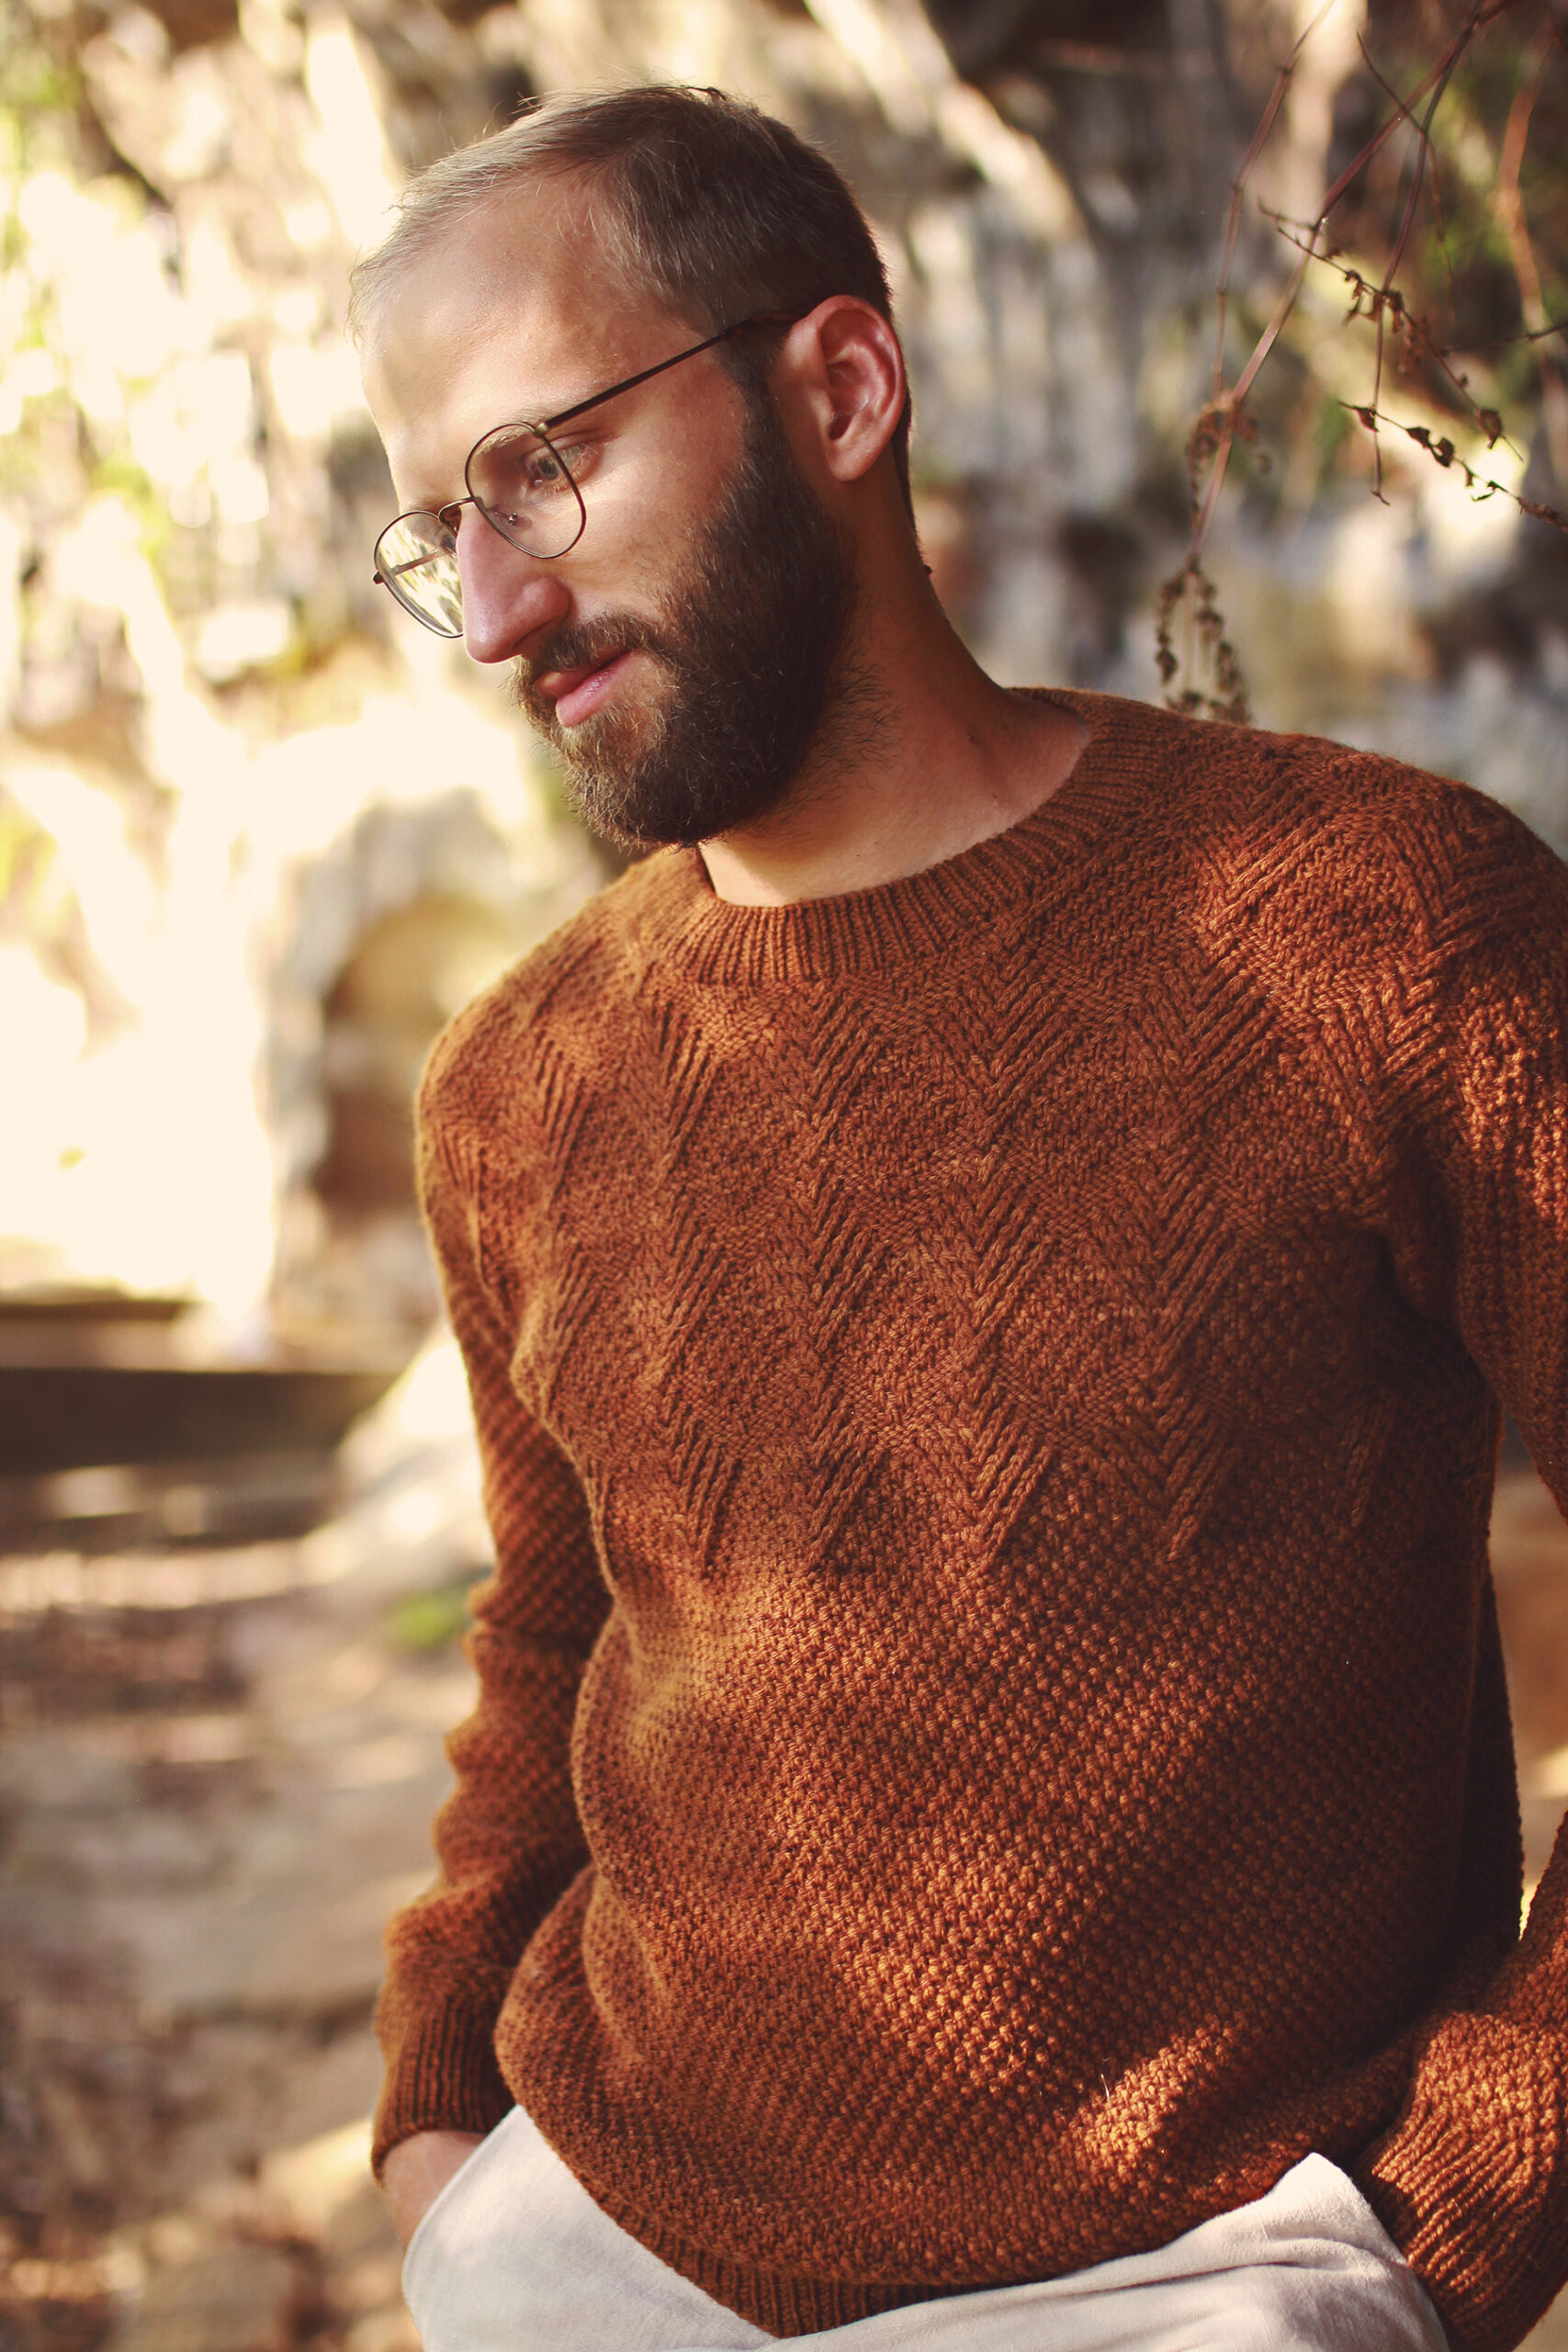
This stitch pattern decorated two designs of mine. The front of the Catkins sweater is dotted with many… well, catkins. Accompanied by sharp seed stitch they look just incredible! The pattern is highly visible and distinct.
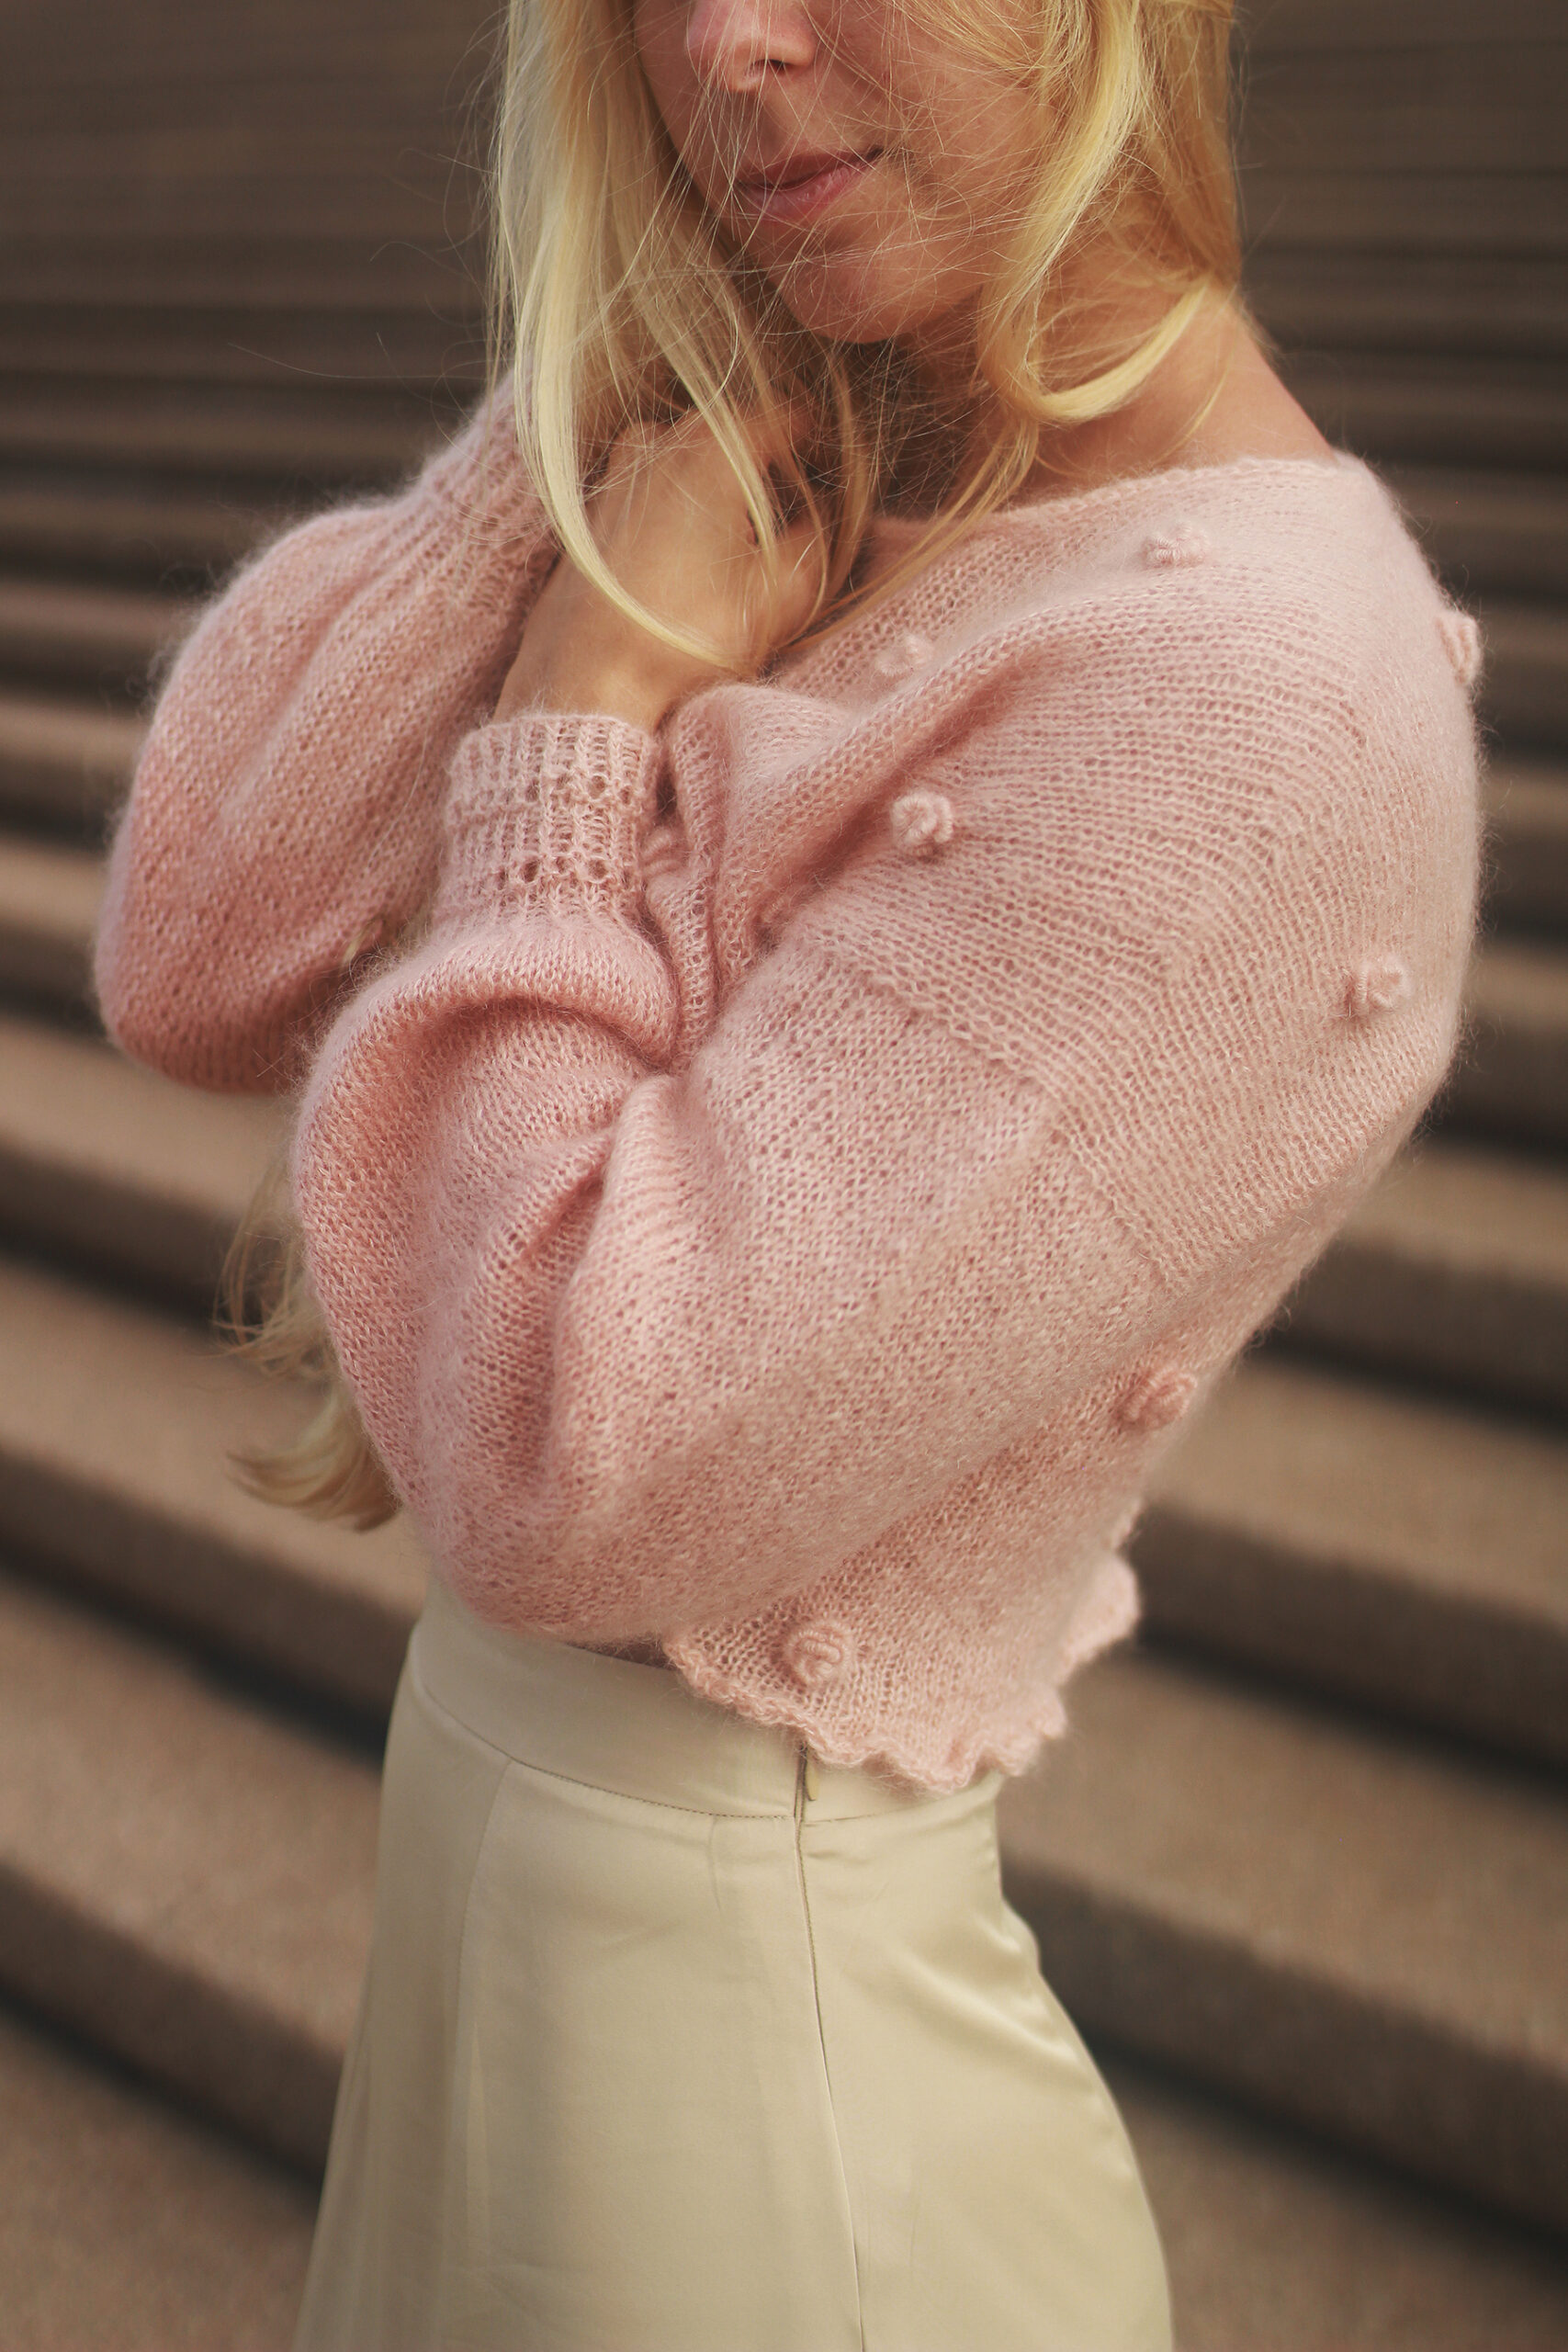
In case of Trivia Hat they (this time I called them shells!) are the main decoration of the entire project, surrounded by a simple stitch and some fluff, which makes the hat look cuddly, delicate and cute.
The most important aspect in both cases is their convexity. It is essential to achieve this feature!
Let’s start with the general explanation of the stitch pattern: this stitch is made by pulling the thread through a set number of stitches placed one over another. The number of loops to pull through depends on the thickness of yarn and the desired effect. This tutorial shows the general rule – number of loops is marked as X and you can easily substitute it with the desired number.
Now it’s time for some practice. Prepare your project – make as much rows or rounds as you wish, reach the place where you would like to add the pattern, set your number of loops (X) and follow the steps below:
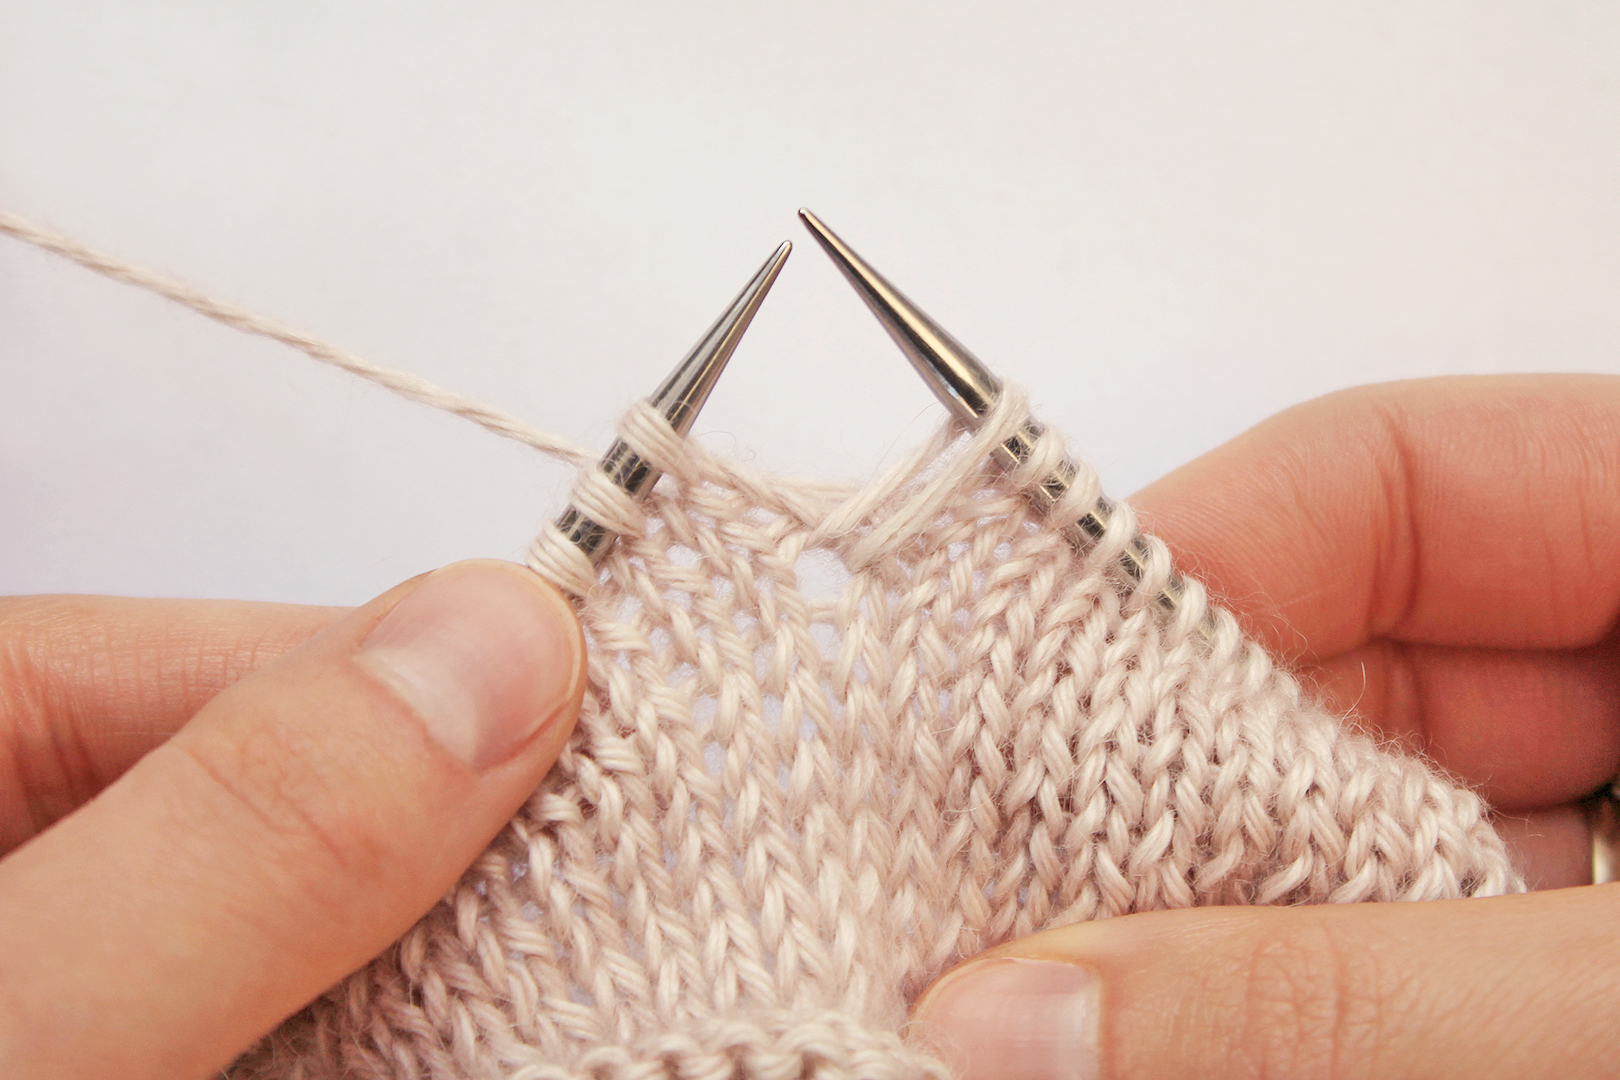
Step 1: insert your right hand needle into the Xth stitch under the first stitch on your left hand needle and pull the thread through, creating a loop. Pull enough thread, so that the loop is taller then X rows. The loop size is essential in getting a nice, visible and convex shape. Leave this loop on the right hand needle.
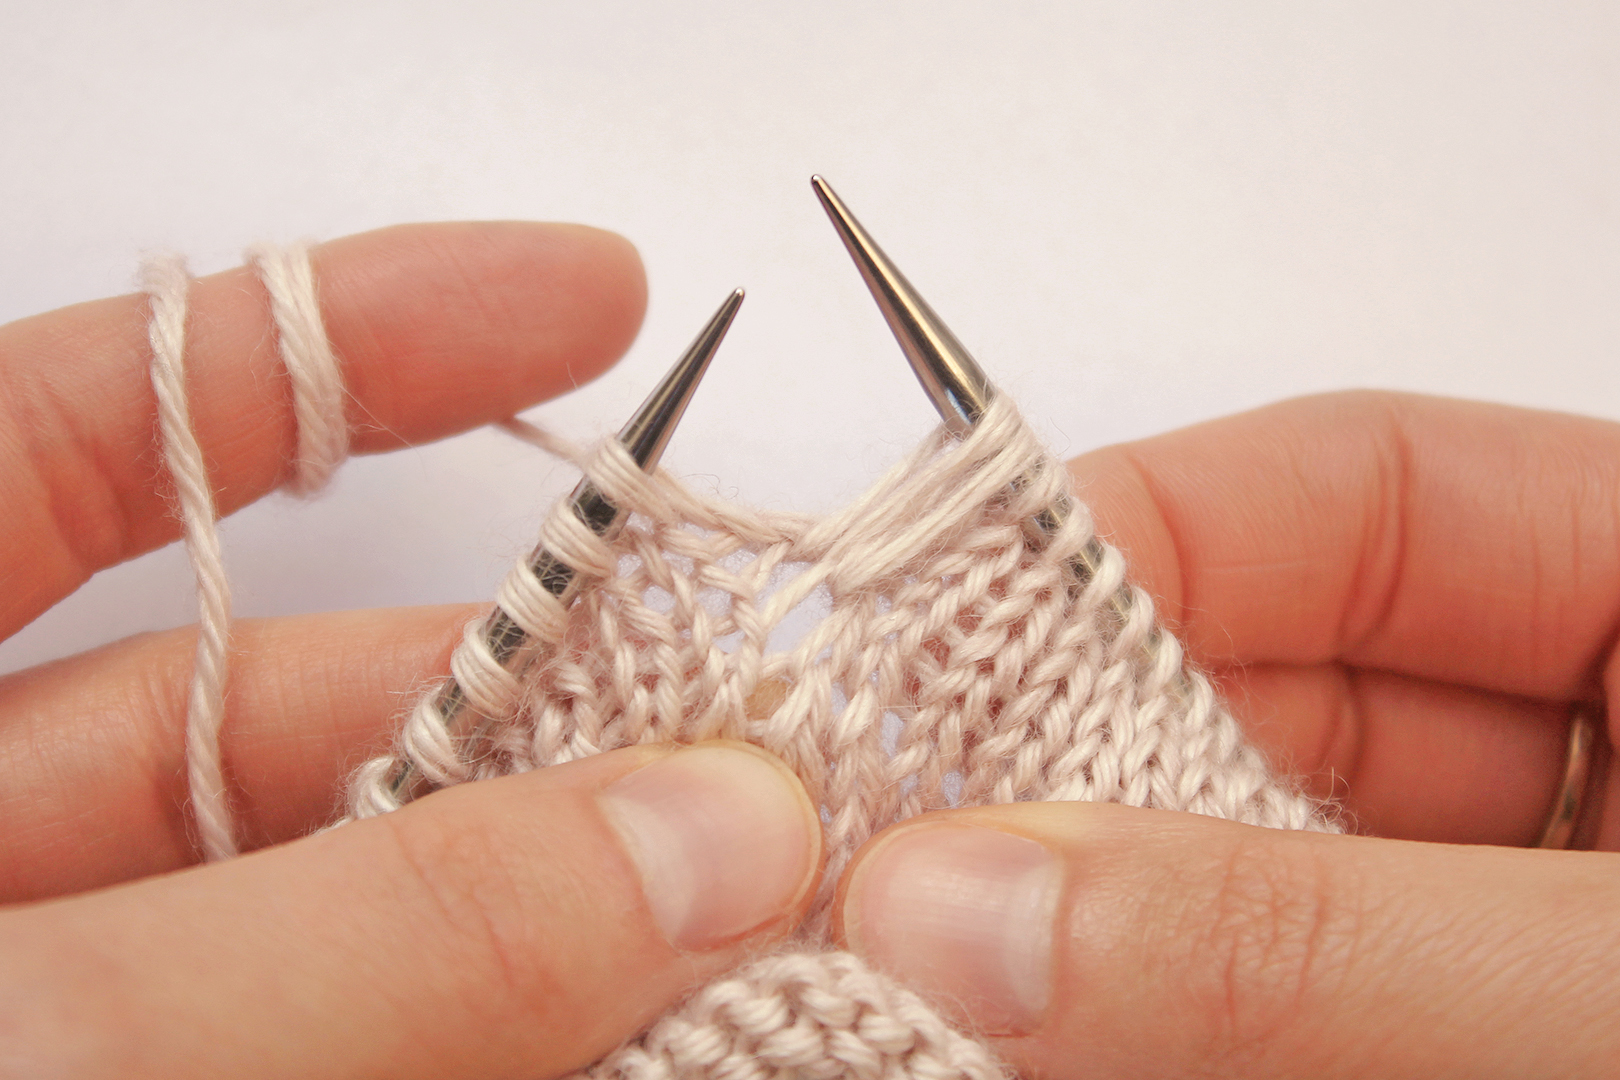
Step 2: insert your right hand needle into the stitch above and pull the thread, creating a loop. Leave this loop on the right hand needle.
Step 3: repeat step 2 until you’ve made X loops in total.
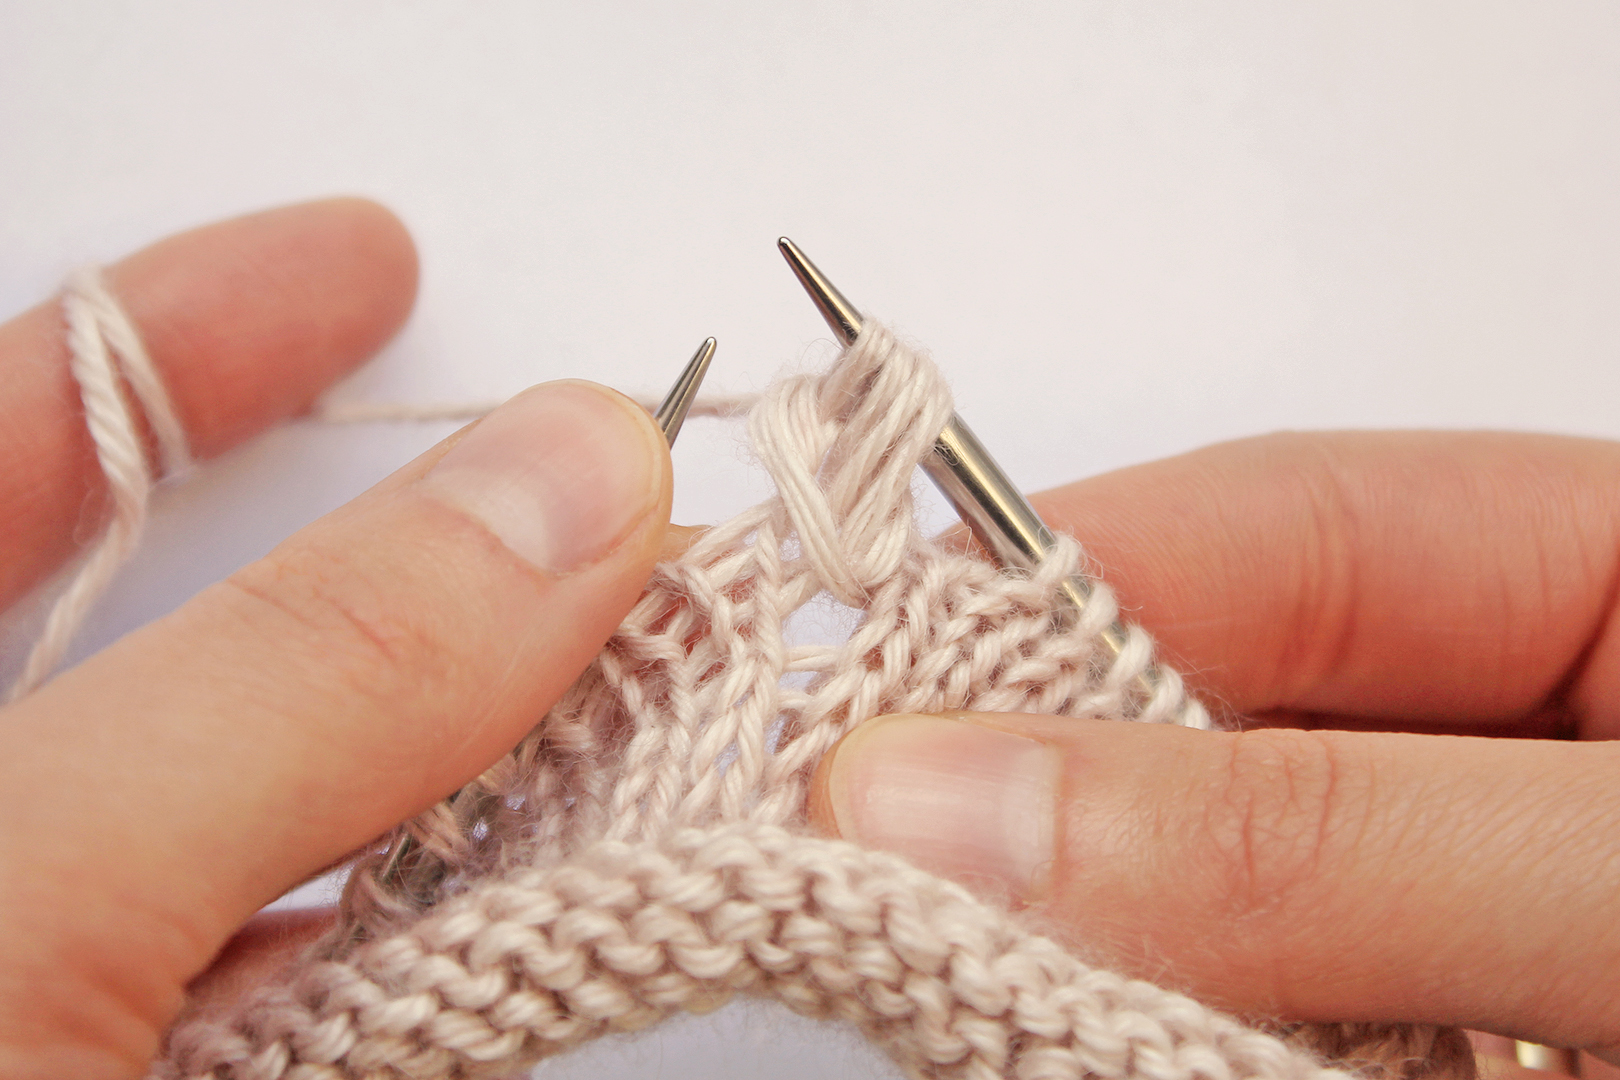
Step 4: work the left hand stitch according to the pattern.
Step 5: using the left hand needle, pass the rightmost loop over all the loops to the left of it on the right hand needle.
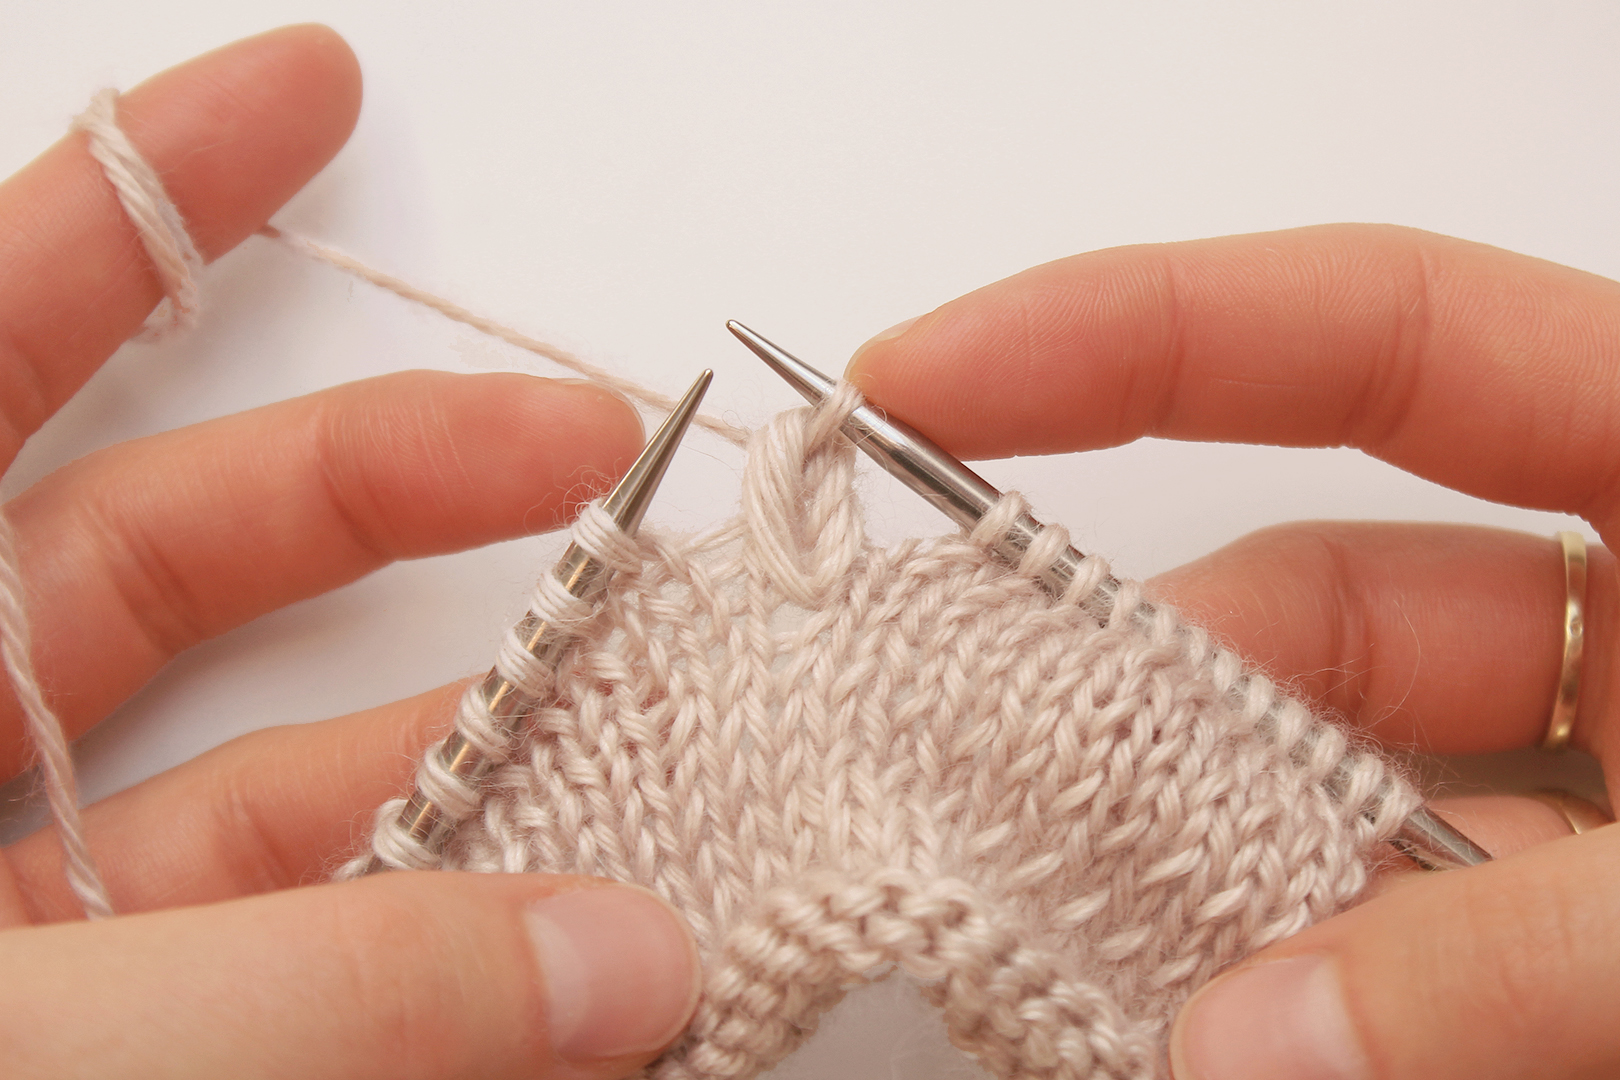
Step 6: repeat step 5 until you’ve passed X loops this way.
And there it is! Don’t worry if you don’t achieve the desired effect in your first attempt. It takes a little patience and practice.Make a few repetitions on a small sample first – try different lengths of loops or thread tension.
Let’s wrap it up with some tips which can help you achieve a nice, satisfying look. I hope it will clarify your doubts and solve all possible troubles:
When passing a loop over other loops, be gentle and do not stretch them.
Work the preceding stitch (the one worked before step 1) quite tightly! You’ll prevent a hole from forming between this stitch and our pattern.
If the final shape of the stitch pattern is not pronounced enough and barely sticks out of the garment, you definitely should make the loops taller.
If the shape of your pattern doesn’t suit you, you can easily fix it later, by pulling and forming the thread gently using a needle. Keep in mind, though, that if the loops are too tight or too loose, you won’t be able to shape them properly later. In such case, it’s better to make it again.
Use the needle while blocking to slightly pull the loops up and make them convex. Use your fingers too to shape them, making them rounded and even. Leave to dry.
I hope you will find this tutorial helpful! If something still bothers you or you have some extra questions, don’t hesitate to ask me! Good luck!
My name is Marzena and I am a knitwear designer, travel lover, pink fanatic and just a very happy and romantic girl, who admires everything connected in any way with nature.