Can you tell me how your sweaters look like… under the arms? Specifically the stitches where the sleeves meet the body? And to be even more precise, stitches under the arm in raglan sweaters or these with a circular yoke, made top-down? If the answer for this question isn’t satisfying or you have no idea what am I talking about, then please read this post! We will deal with a tiny but extremely unruly problem, which, despite its unimpressive size, can spoil the joy of a newly knitted sweater.

Of course I am talking about the holes under the arm formed by overstretched stitches, which drive knitters all over the world crazy!

One step of knitting top-down sweaters with raglan sleeves or circular yoke is separating stitches into three parts: the body and two sleeves. To join front and back part of the body we usually cast on new stitches under the arm and then we pick up additional stitches from this edge to finish the round of the sleeve. This process is quite clever, but not without drawbacks – separating and transferring stitches to the stitch holder or scrap yarn and then moving them to the main needles again overstretches the stitches located right next to the separation point.

Additionally, this place tends to stretch while wearing the sweater as the knitwear is pulled in two opposite directions.

Picture shows a knitted sweater Lea, with circular yoke and made top-down
Lea
Picture shows a knitted sweater Flora sweater made top-down, with raglan sleeves
Flora

The stitches at the beginning and at the end of the cast on/pick up line are the most vulnerable. Let’s take a look at the point where the sleeves meet the body in the Lea and Flora sweaters. I made the first one few years ago and decided to pick up stitches in the usual way (I did my best to do it neatly!). Although initially the stitches looked aesthetically pleasing and they did not differ in appearance from their neighbours, after few years of being worn often, you can see the difference in their size:

Apart from the unattractive look, this situation can also cause weakening and eventually tearing the thread (this is the worst scenario, isn’t it?). Therefore, it’s extremely important to stabilize this strategic place. And believe me… nothing stabilizes a knitwear better than a seam!

I closed the armpit openings in the Flora sweater using this technique – stitches are tight, neat and they haven’t changed their appearance even a tiny bit. And I know it will stay this way, because I already have a few sweaters in my wardrobe with such finish!

Additional note

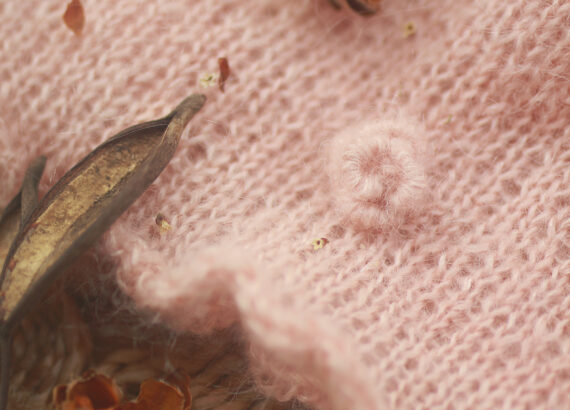
There is another trick to alleviate the issue: picking up 2 more stitches for the sleeves – one on each side of the opening. These additional stitches solve (but in my opinion not entirely) the holes problem, but they do not provide stabilization. Unfortunately, stitches are still exposed to stretching and due to this, holes may form.

Let me convince you to befriend the needle, especially as this method does not require a lot of work, takes only a few minutes and the effect is just phenomenal! You will forget about overstretched stitches once and for all. So, will you give it a chance?

I will use my newly made top-down design with raglan sleeves to show you the process. I casted on 6 stitches under the each arm.

What do you need?

  • a tapestry needle
  • thread of yarn – use the same yarn as in the project
  • scissors
  • a hook to weave in the loose ends of the thread
  • two openable stitch markers or safety pins (helpful, but not required)
  • top-down knitting project with raglan sleeves or circular yoke

Important!

Sewing of the openings will be the last step of working on the project. Nevertheless, while knitting, you have to remember not to pick up the stitches for sleeves, but just cast them on as for the body section.

Lay your project down with the right side and the opening facing you, with the sleeve on one side and the body on the other. Thread the needle but do not cut the thread from the ball. This way, you don’t have to guess how much thread you need for sewing.

But before you start sewing, take a look at the picture below – I marked the first casted on stitches by 2 openable stitch markers. You can easily notice that they are not located at the very end of the opening and using only them for sewing (or even for picking up in a the usual method) definitely won’t close the gap completely.

For this reason we will start sewing a bit earlier, exactly in the place when the knitwear “breakes”. For this, utilise the horizontal threads just before the edge stitches, as shown in the picture below. Do not use the edge stitches as they tend to overstretch.

You should stitch 4 to 6 stitches in total, before you reach the marked spots. Pull the thread gently to create a stable, invisible seam.

Sewing the casted on stitches is even simpler: just use the horizontal loops located on the edge of the opening – each casted on stitch forms one such loop (in my case there are 6 stitches). You should use each loop exactly once and use all of them. Look at the photo below:

Pull the thread gently again to close the gap, then sew the remaining small hole in the same way as in the beginning of the opening (stitch 4 to 6 stitches to be sure that stabilization is adequate).

Pull and cut the thread, weave the loose ends on the wrong side of your garment and hide them into the newly created seam using a hook.

The final result is just incredible, right? There is no hole, knitwear is secured and stabilized properly. I guarantee you will be surprised by the ease of execution and very satisfied with durability. Will you try?

Marzena