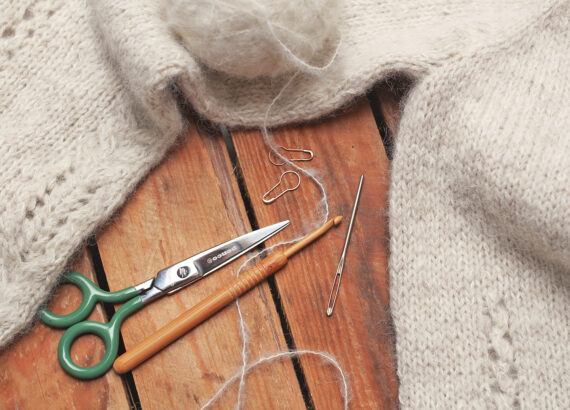
There are many widely known methods of joining two pieces of knitwear. Depending on the needs and desired effect we can join our work using needles, a crochet hook or a tapestry needle, either on the right or the wrong side, stitching closed edges or live stitches. And depending on the chosen method, we will obtain an absolutely invisible seam or a distinct joining line, which will aesthetically separate decorative stitch panels or stabilize the knitted fabric.
Almost 8 year ago, when I was working on one of my very first designs – Merigold sweater – I realized that unfortunately none of these commonly known methods could meet my expectations. My inner perfectionist did not allow any concessions, so I decided to come up with something completely new!

The method I am sharing with you today is my original idea. However, I cannot rule out that this idea has already grown in the heads of many knitters around the world or that there is some other method which provides exactly the same, or very similar, effect. But I would still love to show you my own method to obtain an aesthetic, flat and flexible seam consisting only a single chain of stitches.

As I mentioned above, the One-stitch seam consists only of a single chain of stitches, which significantly distinguishes it from the well-known 3-needle bind off. In this other method we can admittedly get the chain (if we work on the right side of knitwear), but it comes with additional thickening on one side of the seam. The difference is clearly visible in the pictures below:

one stitch seam
One-stitch seam
3 needle bind off
3-needle bind off

To do the One-stitch seam, the stitches should remain live, i.e. not cast off. Both pieces being joined must have exactly the same number of stitches and be placed on two separate sets of needles. If you would like to create such seam on the side/vertical edges (for example on the body sides), simply pick up and knit stitches along the edges and proceed as with live stitches.

What do you need?

  • thread of yarn – you can use the same yarn as in the project, decorative and contrasting one, or even two threads to emphasize the seam even more. In case of my Merigold sweater I used single thread of yarn in the same colour as the entire project. In my newest design Rosemary, to obtain highly rustic and chubby effect, I made every seam by using two threads.
  • cable needle
  • two properly prepared pieces of knitwear (see paragraph above)
  • scissors

Preparation: lay your pieces with right side facing you, as shown in the photo below. If the right hand piece has the long piece of yarn on the left end, you can use it to make the seam. In such case, rip the first stitch from the right needle to make the process easier. Otherwise, take a new thread and leave the first stitch as is.

Note: first stitches of joining may be very inconvenient. I recommend doing it slowly and carefully. Next ones are much easier!

Beginning: place the first stitch from the right needle on the left needle and knit the first two stitches from the left needle together (k2tog).

Step 1: move the newly created stitch to cable needle and place in front.

Step 2: keeping the working thread in the back and between two pieces, slip the next stitch from the right needle on the left one, then knit two first stitches together (k2tog). Leave the newly created stitch on the right needle.

Step 3: place the stitch from the cable needle on the left needle, being careful not to twist it.

Step 4: slip the first stitch from right needle to the left one.

Step 5: pass the second stitch over the first one (PSSO).

Step 6: repeat the steps 1-5 until you bind off all stitches. Cut the thread and pull the yarn through the last stitch to close the seam.

You can also watch the video of me working on three repeats of the stitching on my new YouTube channel!

Tip

To obtain an elastic and good looking seam, you need to use appropriate thread tension. The stitches of your seam should be neat, susceptible to  stretching and without excessive ease. If, after making a few stitches, the seam does not meet these requirements, start over by trying the different thread tension.

And that’s it! I hope you will find it helpful!
If you would like to try this method in a new project, I recommend you to try one of my patterns – Merigold sweater or Rosemary sweater.

Marzena